

Complete Guide to Start a Photography Blog with Bluehost: Steps to Get Started With Your New Photography Bog
If you’re a photographer then you need a website or portfolio website. A website shows how professional you are and what your works looks like. Sometimes you also need to show it to your clients as a portfolio. It does not matter if you’re an amateur or professional photographer, you need a website to show the world your excellent work. You can also get familiar with the people and if anyone wants to hire you, then they can do it via your website. This is the reason you need to learn how can you start a photography blog and create a website without paying any extra to a developer or a developer company.
You may have several social media pages where you can easily connect with people but a website that you own yourself gives the ability to show people that how are serious about your work and job, and you have your own platform to work with. If you look around you’ll find many website platforms that cater especially for photographers. This makes it easy and attractive to setup a blog quickly. You’ll find many platforms that offers complete packages to setup you blog, but from my experience, there is no other platform as powerful as WordPress. WordPress was built to for blogging and ton of plugins and an externally huge community to help you. With WordPress you can setup your new blog within few clicks. This is the best SEO friendly platform that all photographer needs nowadays.
To start a blog with WordPress I recommend using Bluehost or Namecheap hosting. Because they are the best at hosting a WordPress blog and run your website like a bullet. I’m telling this because I own several websites with theses hosting companies and I know how they serve their customers. Today I’m going to talk about how you can setup a photography blog with Bluehost using WordPress. I’ll make another tutorial for Namecheap later.
I use Bluehost for all of my websites because their services are great and cheaper than others, and above all my websites runs like a bullet. So fast. To have a successful photography blog you have to think about a good domain and a best hosting. Because as photography blog owner you need many help from the hosting company. So if your hosting company is slow as sloths, then mark my words you are doomed. You must have a great hosting company with a quick and effective support. In this article I’ll talk in-depth about Bluehost. So let’s start.

Bluehost makes it easy to setup and start a WordPress photography blog. All you need to do is follow the steps bellow:
- Create your Bluehost account.
-
- Pick up a good domain name that matches your photography idea. I’ll explain it later.
- Install WordPress in few simple clicks.
- When done installing, login to your WordPress dashboard and start designing your new photography blog. It’s simple as that!
- Bring traffic to your photography blog. Let me give you some great tips to do this. When I started my first photography website I had no idea how to bring traffic to my website. Now I make more than enough to support my family and myself. I’m also doing some local business with the money that I get from my photography blog. I’ll try to share my experiences on how you can get traffic on your website. The first thing need to do is start your Bluehost account. Click here to check the current price of Bluehost.
If You Want, Read More About Tricks to get most traffic to your blog post.
Supper Easy Technical Part
When you are an owner of a photography blog, you’ll have a tons of pictures and text to use. These pictures and text will be on a computer on somewhere in the world, and that computer needs to open all the time, 24×7. That computer is called your hosting. When you are buying hosting from a company you are paying them for using their 24×7 live computer. That computer makes sure that your photography texts and picture within your website is available for people all the time.
You will need to select a “domain name” to put it on your Bluehost account. I guess you already know what a domain name is! A domain name is an identification string that defines a realm of administrative autonomy, authority or control within the Internet. Domain name comes with various “.” extension like .com, .edu, .org, .io etc. Most people like you and me use .com (.com stands for commercial) extension because it’s the standard and popular one among all of them. Domain name is that, .com extension name that you pick so that people can type it in the web browser address bar and find your photography blog. For example my website name is www.lensforphotography.com. You can pick any “.” Extension that I told above, but I HIGHLY RECOMMEND that you use .com extension for your domain name. Try to pick that .com extension even your domain name is hard to find. Don’t get frustrated if you can’t find the proper domain name, you can change this later, because a domain name only cost around $10.
Making photography blog with WordPress is extremely easy. We used to make website with web programming languages like phn or MySQL etc. But WordPress made it easy for us. We don’t need to worry about those hard coding anymore. WordPress is free software that allows you to make your website easily, you just need to put your domain name there. You just put it to your hosting account to make it incredibly simple and easy to put photography texts and pictures. This works like free blogging platform such as blogger and Tumblr, etc. Using WordPress software on Bluehost, you will be able to endlessly customize your site’s contents with the powerful functionality of WordPress. You just need to give few clicks, and you will see you have your own website and a total control of it. Just to let you know, free blogging platforms do not provide any tech support like Bluehost and has limited functionalities. I call Bluehost at any time, even in midnight, whenever I messed up with my photography site, and they always solve my problems within few minutes.
Here is the complete steps on how you can open account on Bluehost and start your photography blog.
-
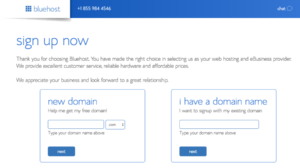
Creating your account on Bluehost
First thing you need to do is create your account. Click here to open an account on Bluehost. I guess you have created your account and came back to this tutorial. When you created your account, you will see few options to choose a package from basic, plus and prime plans. I always recommend start with the basic plane but you can go with plus or prime planes as well. Basic plan is good enough to start a photography blog website using WordPress. Others are great if you want to create more photography blogs later. Higher plans gives you the ability to make unlimited photography blogs on Bluehost, this is one of the reasons I love Bluehost!
-
Choosing The Domain Name
This is one of the most important part when you are about to create your website. When you have selected your hosting package plan, on the next screen you will see, they are asking to select a domain name. This is going to be the .com name of your website. And you know I always recommend to choose a .com domain name extension. When you are going to select your domain or typing your domain name, you’ll see that most of the short and easy looking domain names are already sold. Or if you are lucky enough you will find the name. If you don’t find the exact domain name that you are looking for, don’t get stressed over, just find a suitable one, because you can change this later with just $10.Don’t ever let his stop you from getting started. Just pick one that is similar to your idea.
The best way to find a good domain is to think about your photography idea or the things that is going to be on your photography blog.
Don’t Forget To Check All The Boxes
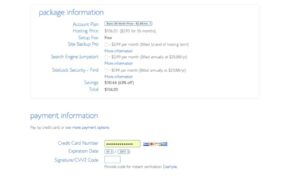
When you are done selecting your photography domain name, on the next page you will see a bunch of options for add-on services from Bluehost. You can just uncheck all the boxes to save some money or just take them all! Honestly you really don’t need those additional services. It may seem appealing to have some of those additional services but trust me, you DON’T need them. But as I said, if you want to add, then fine. I don’t have control over your will, but if you ask me, I am going to uncheck them all. Now all is done and you need to create your password to access your Bluehost account. Your account is all set up.
-
Installing WordPress
Now it’s time to install WordPress software to your hosting. Remember we talked about what is hosting? Yes the computer where you put your website files. On most of the hosting installing WordPress is a pain, because you need to download and upload files, creating database and using FTP clients. In Bluehost, this guys will do it all for you and walk you through all these processes automatically. Start by logging into your Bluehost account by clicking the login button. After you successfully logged in, they will invite you to choose a theme. A “theme” is the basic layout of your website design. Select a free photography theme (just pick one for now).You can change it anytime you want. I’ll give a detail information about theme.so for now just pick one.
Now that you are done with theme, click on that blue “Start Button”, this will take you to your site’s WordPress dashboard and by this way installing WordPress is successfully done on your new photography blog. If you face any problems through this steps, don’t forget to knock BlueHost’s excellent technical support. You can connect with them by clicking that chat icon on the above menu of Bluehost website. Or just call theme directly if you want to. They are available any time.
-
Log in to Your New WordPress Website
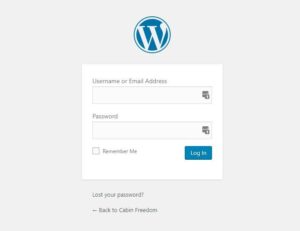
All the parts with Bluehost is done for now. Now except for technical support and renewing stuffs, you rarely need to log in to your Bluehost account. For now let’s start setting your new photography blog. By clicking the button, I discussed above you need to log in to your WordPress website dashboard. In future you need to log in to your WordPress website dashboard by typing www.yourdomainname.com/wp-admin (Place your domain name instead of yourdomainname.com).This is the general way to login to your website dashboard in WordPress. Just remember that “/wp-admin” part. You are going to use this part thousands of times in the coming time. Now put your username and password in the log in form and hit “Log In”. You will have the username and password when you have installed WordPress. And Bluehost also going to mail you the credentials. Just check your mail if you have not saved them before.
Top Things to Do After Installing WordPress
Setup Permalinks: Permalinks is important to setup correctly. Because every time you make new photography post or write an article WordPress is going to auto generate a URL (Uniform Resource Locator) for that. To make the URL user and SEO friendly you need to make sure that the URL is in correct order. You website URL should be like this “yourdoaminname.com/yourpostname” not like this “yourdomainname.com/?p=203”.So to make it correct go to “Settings->parmalinks” and then select “postname” and hit save. Done.
Backup your site: Don’t forget to back up your new photography blog when you’re done with all the designs and posts. Creating backup can save you from many stress. For example, for some reason you messed up with your photography blog or you have upgraded WordPress to a new version, or even some plugins made conflict and your site went crazy. At that time you can always go back to your previous design by using backup. So don’t forget to take backup.
Delete all the plugins that comes with default and install these one that I have listed below:
- Google Analytics by ShareThis
- Autoptimize
- Pretty Links by Blair Williams (the free one)
- Spam Honeypot by Matthew Turland
- Yoast SEO by Team Yoast
- WP statistics
- EWWW Image Optimizer
- Wordfence Security
- Amazon Affiliate Link Globalizer by Attila Gyoerkoes, Markus Goetz (Woboq)
Install Theme: WordPress theme is the framework of your entire website design. Your website designs depends on the theme.so choosing a good theme is always a great idea. Choose a theme that fulfills your photography requirements and has great customization capabilities. You will also find hundreds of free photography themes on the WordPress themes directory. Just search with the keyword “photography”. Or you can buy a premium photography theme.I always recommend my readers few themes that I use on my websites. Below is the list of the themes with links, try them.
- Avada (see the full review on MonchThemes.com)
- X | The Theme (see the full review on MonchThemes.com)
- Oshine
- Uncode
- Jevelin
You can buy these themes from themeforest.net.Themeforest.net is one of the largest market to find WordPress themes. It has more than 11,000 WordPress themes.
Write Good Posts With Your Photography Picures: Writing good post is the most important part. Stick with your photography idea and your work. To attract users to your blog or website, you will want to write great post fill with tons of good and valuable information about photography. Don’t try to write short contents or just don’t write big contents just because you need to write. Write to help people and to show how skilled you are in your work field. Think about the contents that will help people to learn photography and within that helping you can sell your affiliate products. Contents between 2000-3000 words will do great for your photography blog. Google loves fresh and new contents. It will be good for SEO as well. This type of articles rank good on search engines.
Resizing Images: You don’t want your site to be run slowly. Generally we use big photography images on our blog and those images make our blog slow as hell. So before adding images use photo resizing software’s like Photoshop (of course you about it!) to resize images. I always like to keep my blog images under 120k minimum. There are also some good plugins that helps to resize images. I personally use EWWW Image Optimizer. It’s free and does a great job.
Sign up for affiliates programs: Now that you have done with your photography blog and written some great contents, sign up for some awesome affiliate programs that will help you to make a good income. As beginner Amazon affiliates will be great for you. When you are signed up with amazon affiliate then you will get a tracking id, which you can add within your post text and connect Amazon photography products to it. When your users click on that and buy that photography product that u have recommended, you’ll get your commission from Amazon through that affiliate program. When you have setup amazon affiliate and learned about it and know how affiliate works, then go for the other affiliate programs. To know more about affiliate programs check this website,WeeBros.com
Blocking Spam: When you are done with photography blog setup, you’ll face new problem with lots of spammy comments. To block this comments you need a good plugin. This is why I recommended using Akismet plugin.
Making strong password: You will see everyday lots of people (hackers!) are trying to access your blog or break through it. For this reason make a strong password and use this plugin which is called Wordfence Security. This has both paid and free version, just use the free one.
Getting Traffic Your Blog Website
Now let’s talk about how you can get traffic to your newly up and running photography blog. Learning to get traffic to your website is an in-depth topic. To get traffic involve with social pages or make one. Try to write SEO friendly contents. Make pages on different social networks like Pinterest or Facebook. The most effective way is to make YouTube videos and get people to your website. Here are few points on how you can bring people to your site.
- Make long articles with valuable information in it.
- Make articles that help people
- Try to write human interested articles in story style.
- Do a good SEO keyword search.
- Write problem solving articles.
For more information please check this website WeeBros.com. They have ton of resources to teach you how to get traffic on your new website or blog.
Monetize Your Website
There are two ways through you can monetize your photography blog and make more income.
- Affiliate Marketing:
Join with different affiliate programs like Amazon associate, Clickbank, ShareASale, CJ etc. Post links with your contents from this sites and make good sell.
- Advertising: Apply for Google AdSense. Google AdSense is one of the best way to increase your income.
Final Thoughts:
Starting up a photography blog is exciting and at the same time it can add an extra income to your profession. You have your computer, camera and know how to write, then why sitting ideal? Start a passive income today by setting up your own photography blog where you can write and share your experience with the world. This will help you to garner your daily income. So start with Bluehost today and let the flow coming.
You may also like


Why Your Blog Website is getting low Traffic?
